FT1.2 / KBerry wiring samples

Video

This page shows two practical ways to use Serial FT1.2 (TPUART) with KNX Ultimate:
- a Weinzierl KBerry mounted on a Raspberry Pi (hardware UART)
- a generic TPUART / FT1.2 interface connected to a PC through a USB-to-UART adapter
In both cases the KNX bus is handled directly over the FT1.2 (TPUART) serial interface, without KNXd.
⚠️ Always follow the datasheet of your hardware.
Wrong wiring (voltage, polarity, RX/TX crossed with 230 V etc.) can permanently damage the KNX interface, the USB adapter or the PC/Raspberry.
A. KBerry on Raspberry Pi (hardware UART)
This setup is ideal when you want a compact KNX gateway using a Raspberry Pi + KBerry HAT, running Node-RED and KNX Ultimate directly on the Pi.
A.1 Required hardware
- Raspberry Pi 3 or 4 (Model B recommended)
- Weinzierl KBerry KNX interface (mounted on the 40-pin GPIO header)
- KNX TP bus (twisted pair) with 30 V power supply
- microSD card with Raspberry Pi OS
- Optional: case that fits Raspberry + KBerry
A.2 Electrical wiring / schematic
On the Raspberry Pi side, KBerry sits directly on the 40-pin header and uses the primary UART:
Raspberry Pi GPIO header            KBerry
-----------------------------------------------
Pin 2  (5V)                      ->  5V
Pin 6  (GND)                     ->  GND
Pin 8  (GPIO14, UART0_TXD)      ->  RX (TPUART IN)
Pin 10 (GPIO15, UART0_RXD)      ->  TX (TPUART OUT)
You normally do not need to add loose wires: just plug the KBerry onto the GPIO header so that all pins line up correctly.
On the KNX bus side, connect the two screw terminals:
KBerry KNX terminals              KNX Bus
-----------------------------------------------
KNX+                            ->  KNX line +
KNX-                            ->  KNX line −
Make sure the KNX bus power supply is wired correctly and the total bus load (current draw) stays within the specification of your KNX power supply.
A.4 Enable the hardware UART on Raspberry Pi OS
On Raspberry Pi OS Bookworm the UART configuration lives under /boot/firmware/config.txt.
-
Edit the config file:
sudo nano /boot/firmware/config.txt -
Ensure these lines are present (or add them at the end):
enable_uart=1
dtoverlay=pi3-disable-bt
This disables on-board Bluetooth (which otherwise steals the UART) and enables
ttyAMA0. -
Disable services that might grab the serial port (if installed):
sudo systemctl disable --now ModemManager sudo systemctl disable --now bluetooth.service -
Run
raspi-configand adjust the serial options:sudo raspi-config- Interface Options → Serial Port
- “Login shell accessible over serial?” → No
- “Enable serial port hardware?” → Yes
-
Reboot:
sudo reboot -
After reboot, verify the UART:
ls -l /dev/serial0
ls -l /dev/ttyAMA0
dmesg | grep tty
You should see
serial0 -> ttyAMA0and/dev/ttyAMA0present.
A.5 Give Node-RED access to the serial port
On Linux the user that runs Node-RED must belong to the dialout group to open /dev/ttyAMA0.
-
Check the service user (often
noderedon Raspberry Pi OS):id nodered # or: id pi -
Add it to
dialout:sudo usermod -aG dialout nodered sudo reboot
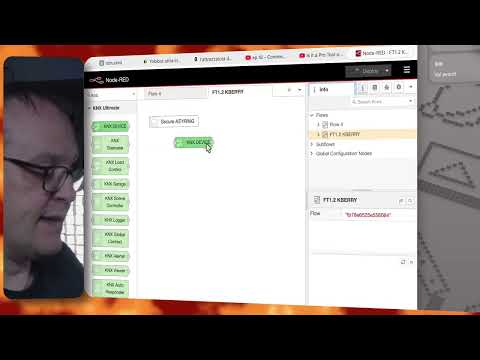
A.6 KNX Ultimate gateway configuration (KBerry)
In the Gateway configuration node:
- Connection protocol:
Serial FT1.2 - Serial port:
/dev/ttyAMA0 - Interface type: Serial FT1.2 / TPUART
- Serial FT1.2 mode: KBerry/BAOS
- Baud rate:
19200 - Data bits:
8 - Parity:
Even - Stop bits:
1
Once deployed, the KNX Ultimate node should connect and start sending/receiving KNX telegrams via the TP bus.
For more FT1.2 options, see the main Gateway configuration menu.
B. FT1.2 interface via USB-to-UART on a PC
This scenario is for running Node-RED + KNX Ultimate on a PC or server and connecting to a TPUART / FT1.2 board via a USB-to-UART adapter.
B.1 Typical hardware
- PC or small server (Linux or Windows)
- USB-to-UART adapter (FT232, CP2102, CH340, etc.)
- TP/FT1.2 (TPUART) board exposing RX/TX, GND and VCC pins
- KNX TP bus and power supply
⚠️ ‼️ Match voltage levels. Many TP/FT1.2 boards use 3.3 V logic.
Do not feed 5 V UART into a 3.3 V-only interface unless the vendor explicitly allows it.
B.2 Wiring schematic (USB-UART ↔ FT1.2 board)
The exact pin names depend on your hardware; the mapping is normally:
USB-UART adapter                FT1.2 / TPUART board
-------------------------------------------------------------
TXD                         ->  RXD (UART receive of FT1.2)
RXD                         ->  TXD (UART transmit of FT1.2)
GND                         ->  GND
VCC (3.3 V)                 ->  VCC (only if the board is not powered otherwise)
And on the KNX side:
FT1.2 / TPUART board KNX pins     KNX Bus
------------------------------------------------
KNX+                           ->  KNX line +
KNX-                           ->  KNX line −
Some boards expose extra pins such as RESET or FAULT.
If the vendor requires RESET to be driven at startup, wire it as specified in the datasheet (for many modules it is simply pulled up and not used).
Create the corresponding image files under img/wiki/ so that the links show your real hardware.
B.4 KNX Ultimate gateway configuration (USB-UART)
In the Gateway configuration node on the PC:
- Connection protocol:
Serial FT1.2 - Serial port:
- Linux:
/dev/ttyUSB0,/dev/ttyUSB1, … - Windows:
COM3,COM4, …
- Linux:
- Interface type: Serial FT1.2 / TPUART
- Serial FT1.2 mode: Standard FT1.2 (not KBerry/BAOS)
- Baud rate:
19200(unless your hardware vendor specifies a different value) - Data bits:
8 - Parity:
Even - Stop bits:
1
After deploying, check the KNX Ultimate node status:
- green / connected → FT1.2 serial link is working
- errors about serial port → check permissions, port name and that no other program is using the same serial device
- timeout / no ACK → verify RX/TX are not swapped and the KNX bus is powered
B.5 Troubleshooting checklist
-
Confirm the USB-UART adapter is visible in the OS:
# Linux
dmesg | grep ttyUSB
ls -l /dev/ttyUSB*
On Windows, check Device Manager → Ports (COM & LPT).
- Make sure Node-RED’s user is allowed to open the serial port:
- Linux: add it to the
dialout(or equivalent) group. - Windows: usually no extra permission is required.
- Linux: add it to the
- Double-check KNX polarity (KNX+ vs KNX-) and that the bus power supply is within specification.
With these two examples you can choose whether to run KNX Ultimate directly on a Raspberry Pi + KBerry HAT or on a PC with a USB-to-UART + FT1.2 board, using the same Serial FT1.2 transport in the gateway configuration.